


.jpg)


.png)


.jpg)


I am loving my "little" project that took me about 20 minutes today!! Talk about drab to fab. If you can't tell yet I am definitely tooting my own horn on this one. I have had this clock for a while and I like it, buttt I can't leave anything alone. I think everything in life should be embellished....So here is a quick and easy fix if you have a wall to fill... and it was free!!!!
So here is what you need..
Clock , Vintage sheet music, hot glue gun (of course), stapler. The white foam board was not used, I planned on attaching it to the back almost like a frame but I didn't think it was necessary once I got started.
 Here is what the back of the clock looks like, just plain "board".
 Another must have These little yellow plastic triangle things.. Hubs bought these for me at LOWES and I use them all the time, you can even use them to prop up a 200 lb cabinet so you can paint it. They are in the paint section.
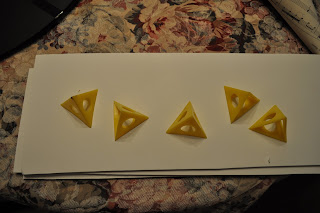 here's a close up....
 OK I know what you are thinking.. my table cloth doesn't match my curtains, I know... this is one of those things that on a normal day unless you live here you don't see the table cloth....
 Roll your sheet music and stick a piece of tape on it, after that I always put a little bit of hot glue "inside" the seam for extra support. Then staple about 1" up from the bottom of the cone. This will help be a guide, so your cones are even in length and it also makes attaching the cone easier. I start out placing my cones evenly like this then start filling it in. On this clock I did two layers of cones I did the cones you see below and then I went back and in between each one I put a longer cone, you will see what I am talking about in the final picture. Once all your cones are glued down your done!!!!
 And this is what it will look like...I am really happy with it. I have been trying to find something "huge" to fill this wall and now my quest is over.
 A little tip.. I wish I would have hot glued the foam board on to the clock like I had originally planned. When I was finished and started to hang this on the wall I had a few cones flopping around and I had to tape them up. Even though I love this I do wish I would have put more cones on the back row. I hope you enjoyed this tutorial and I hope it got some creative juices flowing for you.... It really only took about 20 - 30 minutes it would only take about 10 minutes start to finish if you pre rolled your cones.

So here is what you need..
Clock , Vintage sheet music, hot glue gun (of course), stapler. The white foam board was not used, I planned on attaching it to the back almost like a frame but I didn't think it was necessary once I got started.